
Taking a Maltol measurement is one way to validate your Raman system. StellarNet uses Maltol as a standard. Each Raman system ships with a Maltol sample that has been previously tested with your setup.
Review the instructions and warnings for each of the pieces of equipment. Be sure to always practice laser safety (keep your goggles on!).
Open the StellarPro software and verify your spectrometer is connected:

If your spectrometer is not connected, click the “Connect” button

to reconnect your spectrometer.
Navigate to the Raman application in StellarPro – found on the left side of the software window.

You may notice that the X-axis is still in nanometers by default – to switch to cm-1 (Raman shift), navigate to the Tools tab.

Click the green “+” and click the down arrow next below “Processing Step” – a list of different options will appear.
To display Raman Shift (cm-1) instead of nanometers, choose the “Raman Shift” option,
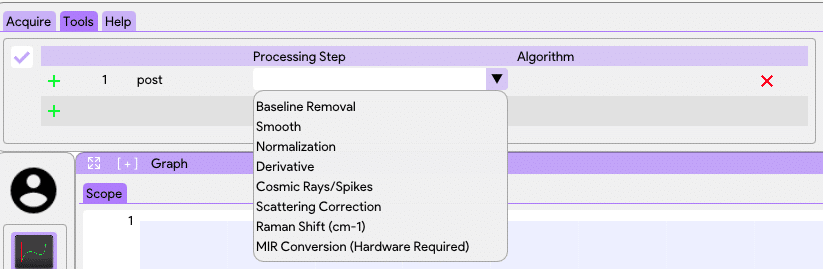
Next, we will click the wrench that appears under “Algorithm”

Here is where we will confirm the excitation wavelength of the system, in this current example, we are using a 785nm excitation, so I will confirm this in the option window.
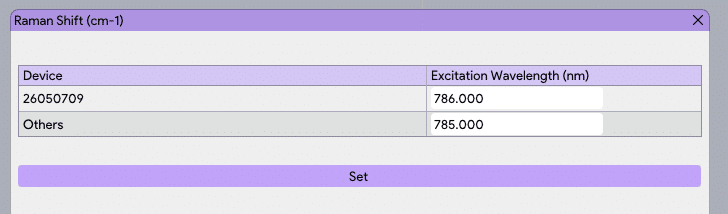
Click “Set” to confirm any changes you make.
Now, the next measurement we take, we will see Raman Shift instead of nanometers on the X-axis.
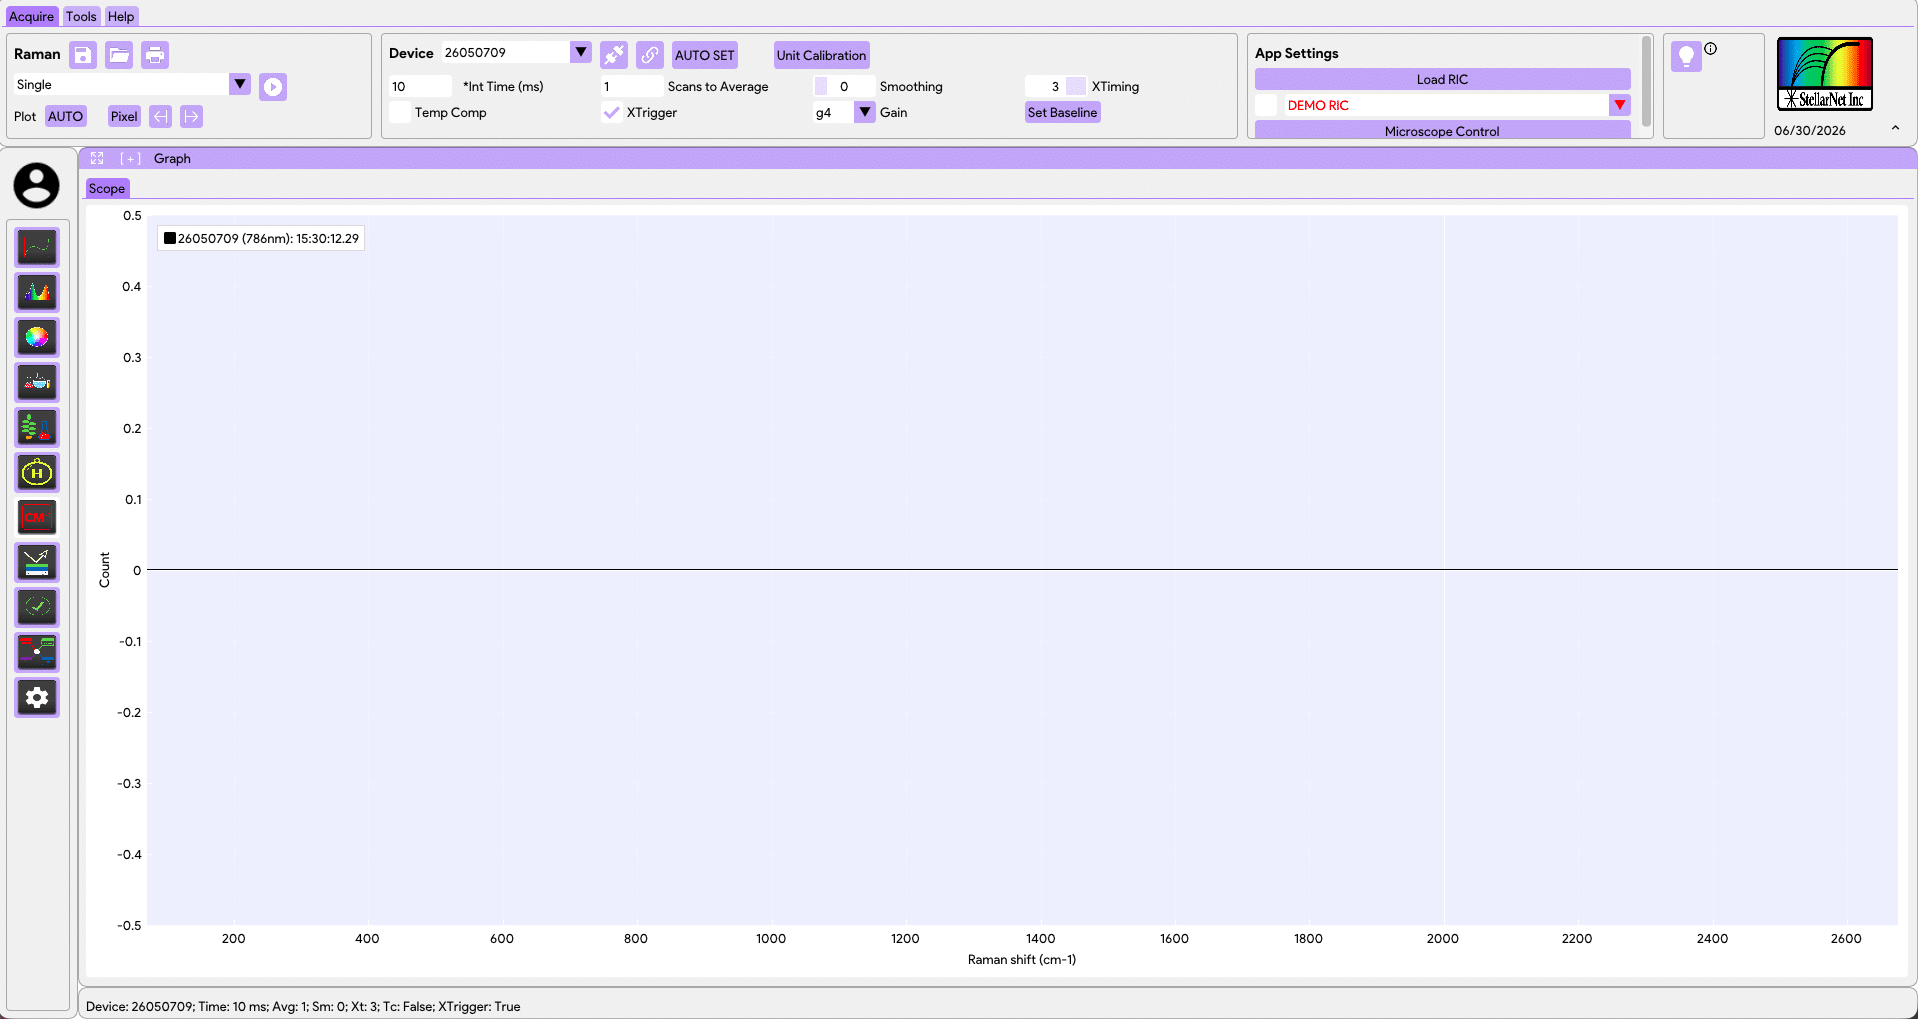
Confirm your probe is properly connected to the spectrometer and laser (laser end is green tip – be careful inserting the probe tip as it is delicate).
Review the settings used in the sample Maltol measurement included in your system paperwork.
For this example, the integration time used during testing was 1000ms. We will use the same integration time.
Enter the integration time. To update the integration time, make sure to click *Int Time (ms) if it is red.

Now we will take a dark measurement. With the integration time set, we will click the “dark measurement” bulb.
If no dark has been taken, the bulb will not be filled in. Once you take a dark measurement, you’ll notice the bulb fills in to indicate a dark has been taken.


The remainder of this guide will use single shot mode, but you can also utilize loop mode.
Take the Maltol Measurement
With laser safety eyewear in place, switch the probe to open, and press fire on the laser.
Note: for systems that include the RamuLaser, the “Fire” button needs to be physically pressed for the entirety of the measurement. SE-Laser does not require a physical touch for the full measurement.
After you press the “fire” button on the laser and the “Capture” button in the software, you should see the spectra displayed on your screen. If it doesn’t match right away, try adjusting the laser power or the probe distance to the sample.

Here is the maltol measurement with the probe barely into the sample holder:
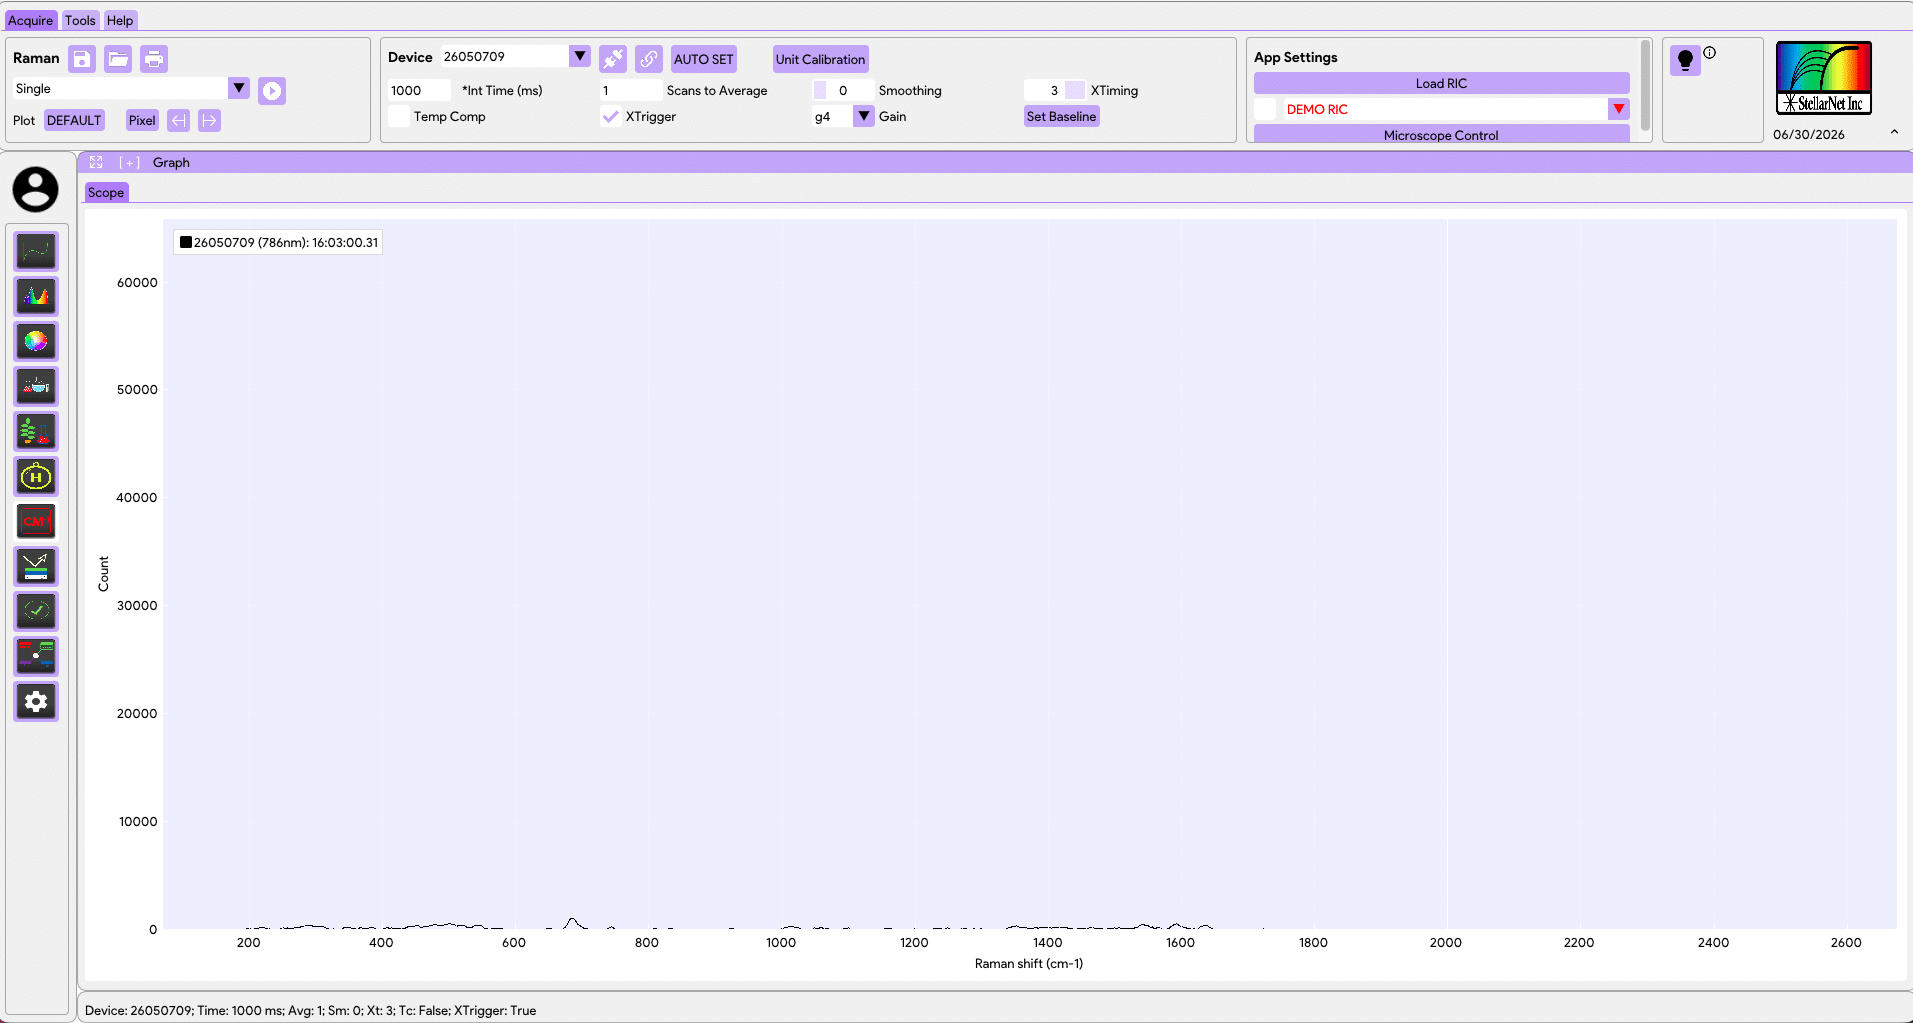
Here is the Maltol measurement with the probe inserted almost fully (which closely matches the example spectrum).
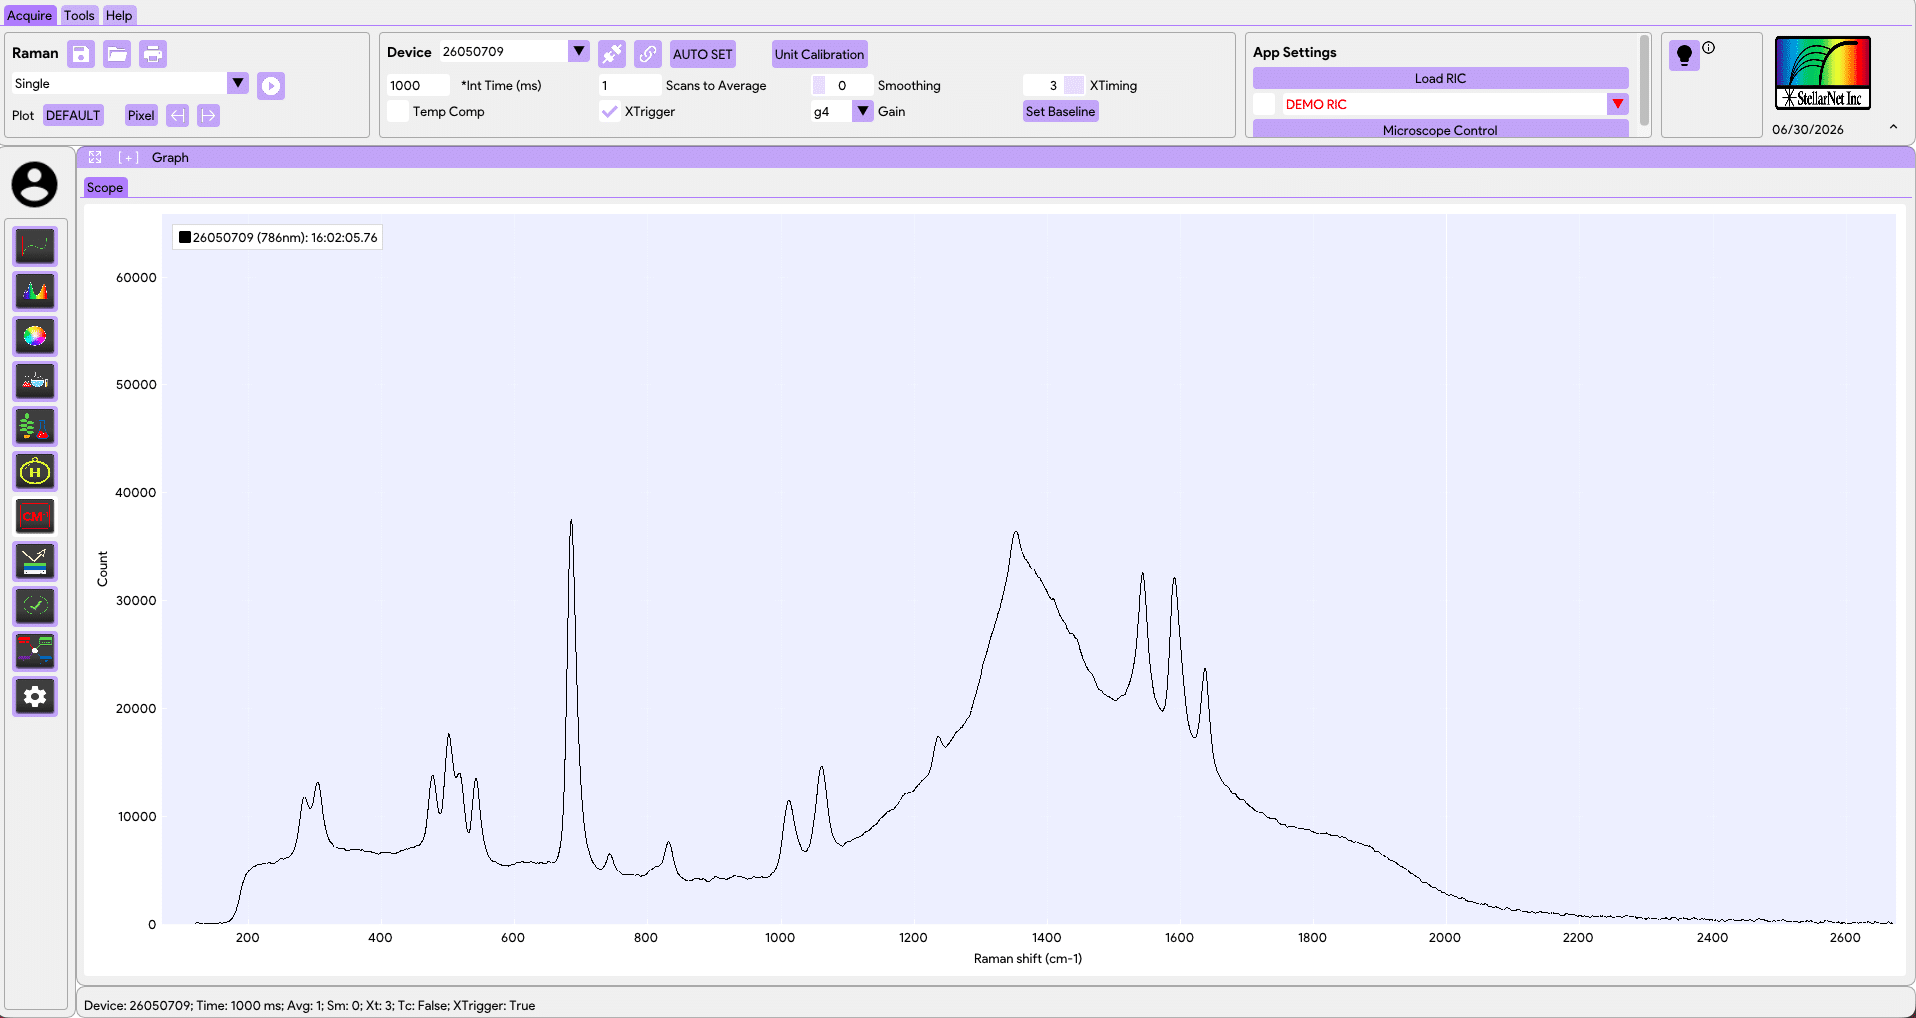
From here, you can go on to test other samples.
Tips and Tricks
- Be sure to take a new dark measurement after adjusting the integration time!
- Make small adjustments to the probe and see how it changes the spectra – the goal is to get to the proper FD of the probe.
- Experiment! Try different integration times, laser power levels, and settings. StellarPro features baseline correction and other algorithms for analysis.