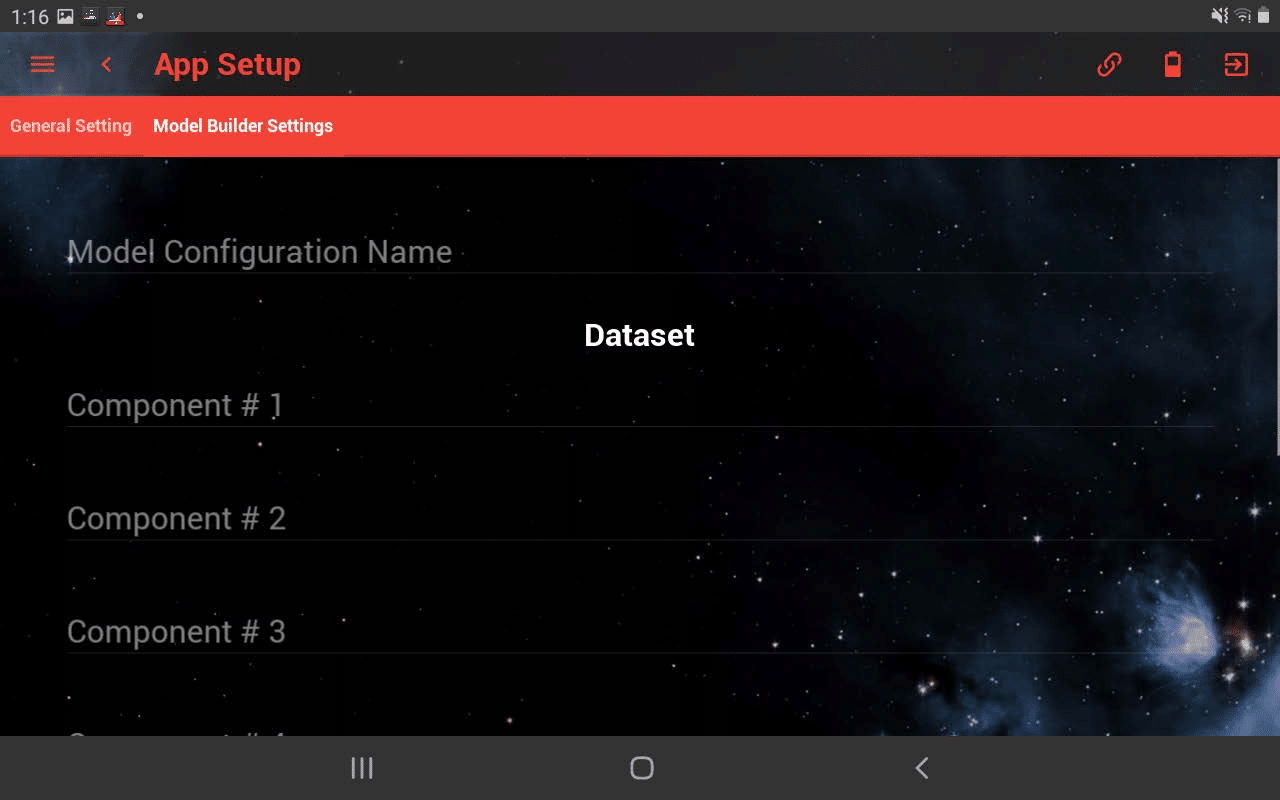
- Go to “App Setup”, and select “Model Builder Settings” tab.
- Enter the model configuration name and the components name. Note, if the model only has one component, you can leave the other component blank.
- Click the “Configure Model” button, the model configuration will automatically be loaded into the model builder.
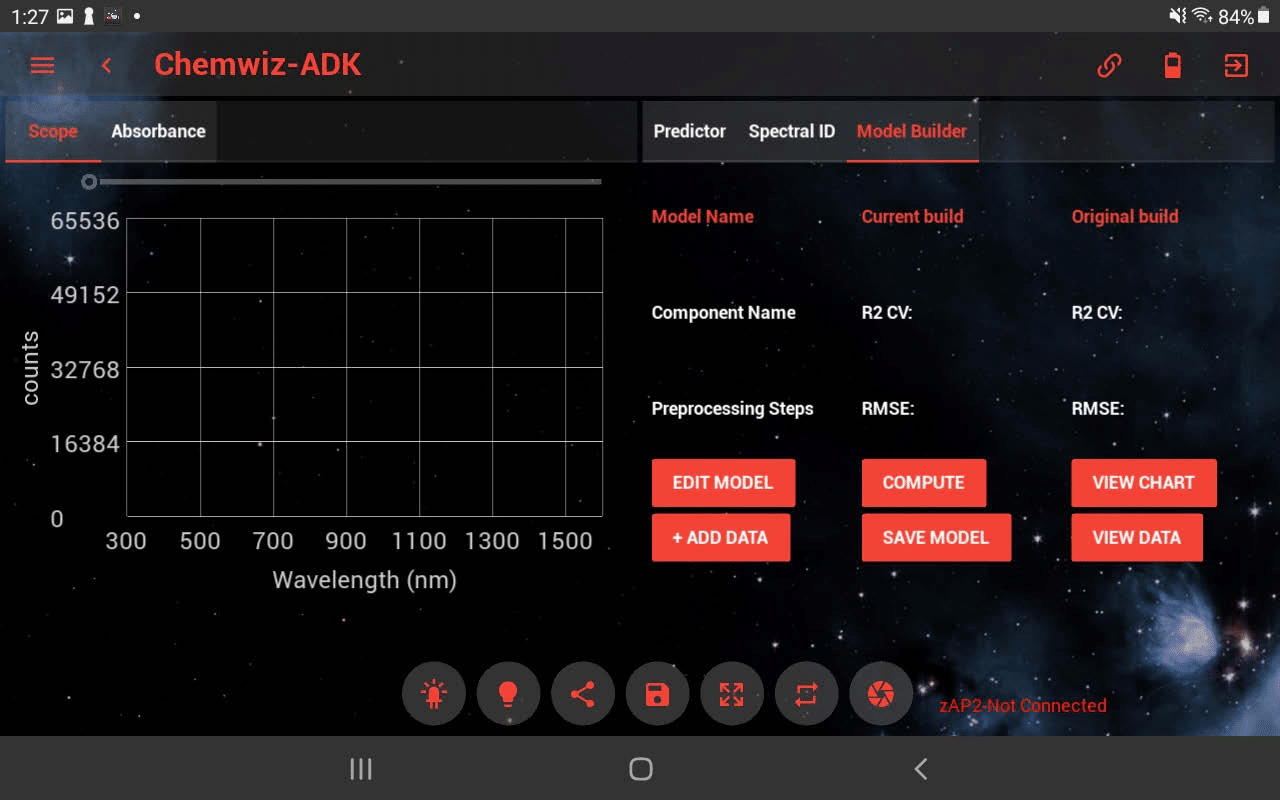
- Navigate back to the home screen and click “Model Builder” tab on the right panel. You should see the recently created model configuration is loaded. If not, click on the “Edit Model” button and then select the model folder and click .ini file to load the configuration.
- Follow the measurement procedure above to capture the reference and the dark data.
- Place the sample on top of the fixture and click the Capture button to collect the spectrum.
- Click the “Add Data” button to add the sample.
- A popup window ask you to enter the sample name and the component values, click “Add Data” button to save the data.
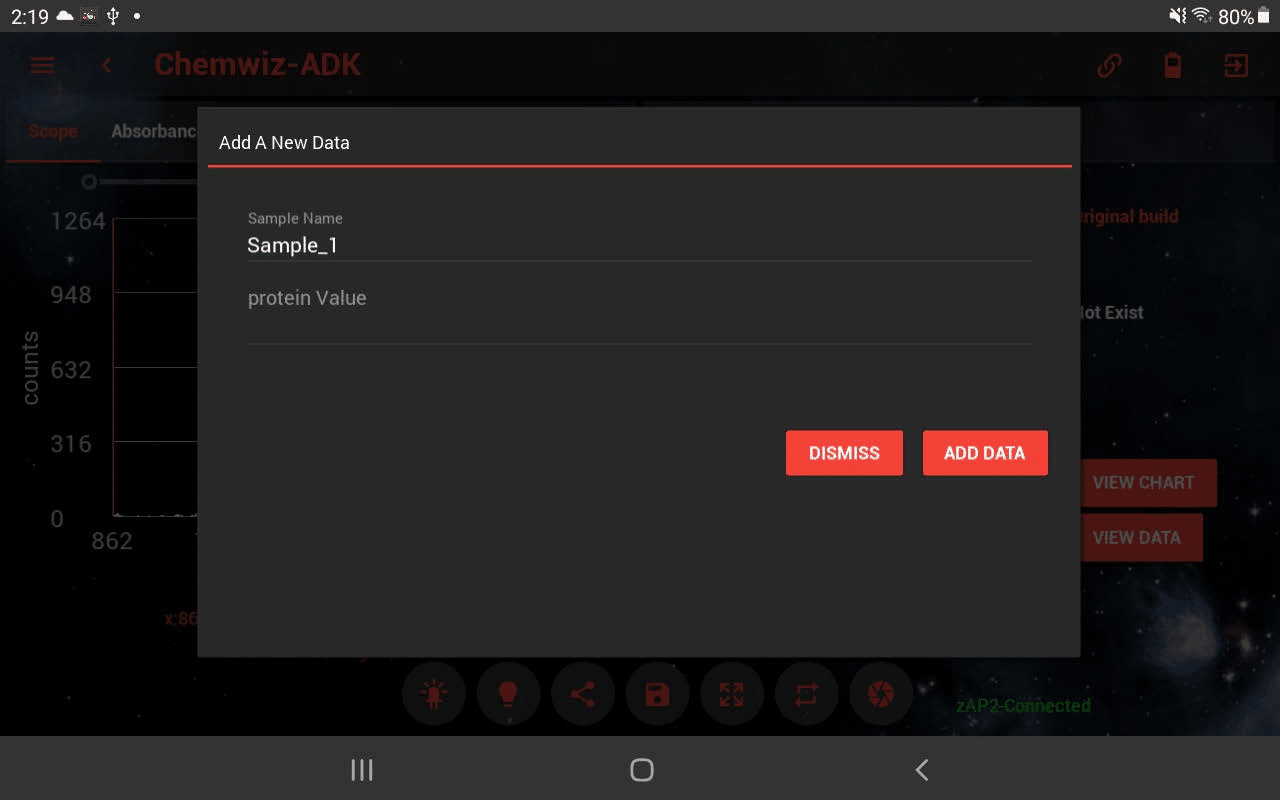
- Repeat Step 6 to Step 9 until all desired samples are added for the model building. Note, at least 3 data values are needed. However, more data is better!
- Click “Compute Model” button to create a model using the added data.
- In the popup window, select the data preprocessing steps. Note, depends on the data, some preprocessing might have negative affect, thus several trials of computing the model might be needed to achieve the best model.
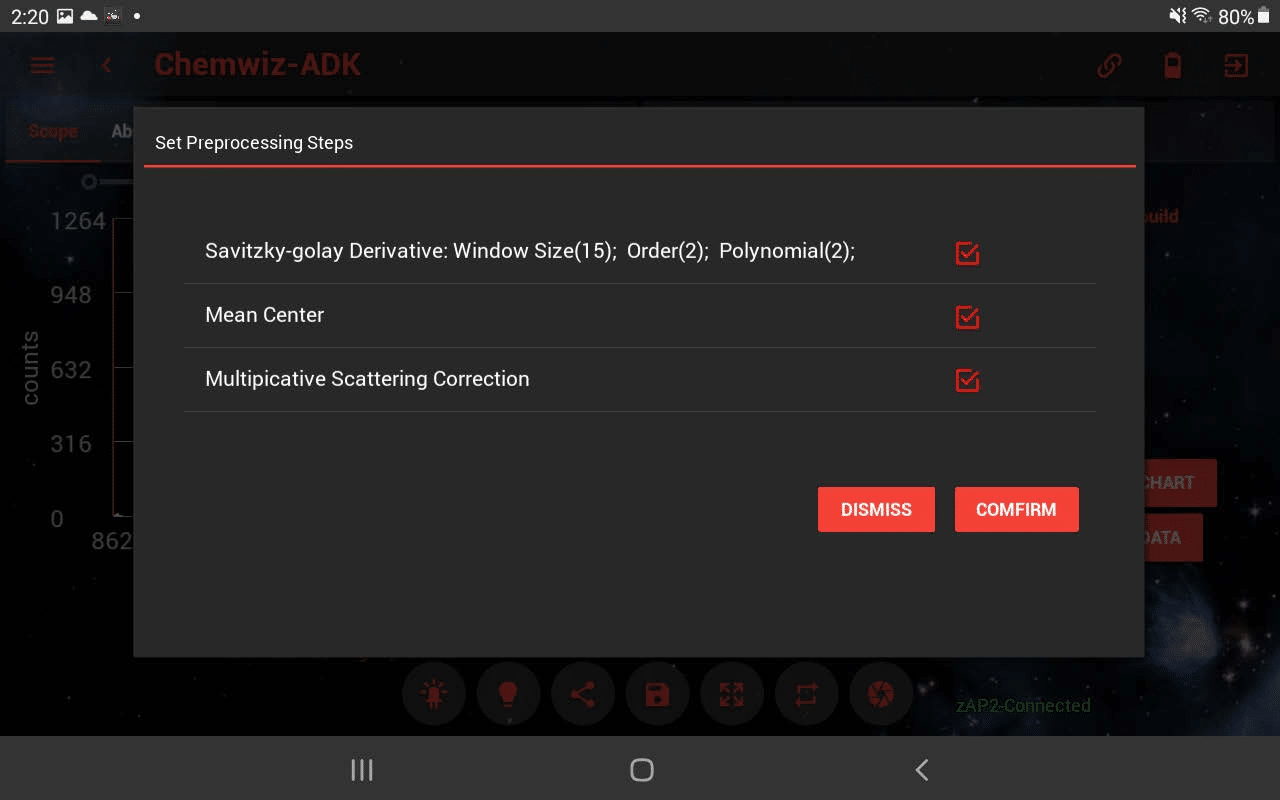
- Click “Confirm” to compute the model.
- In the “Model Builder” panel, computed model result will be displayed, this includes R square(close to 1 is better) and RMSE (close to 0 is better). This information is used to determine the goodness of the model. Recompute or add data to improve your model. Note: if R square is nan, then more data is needed.
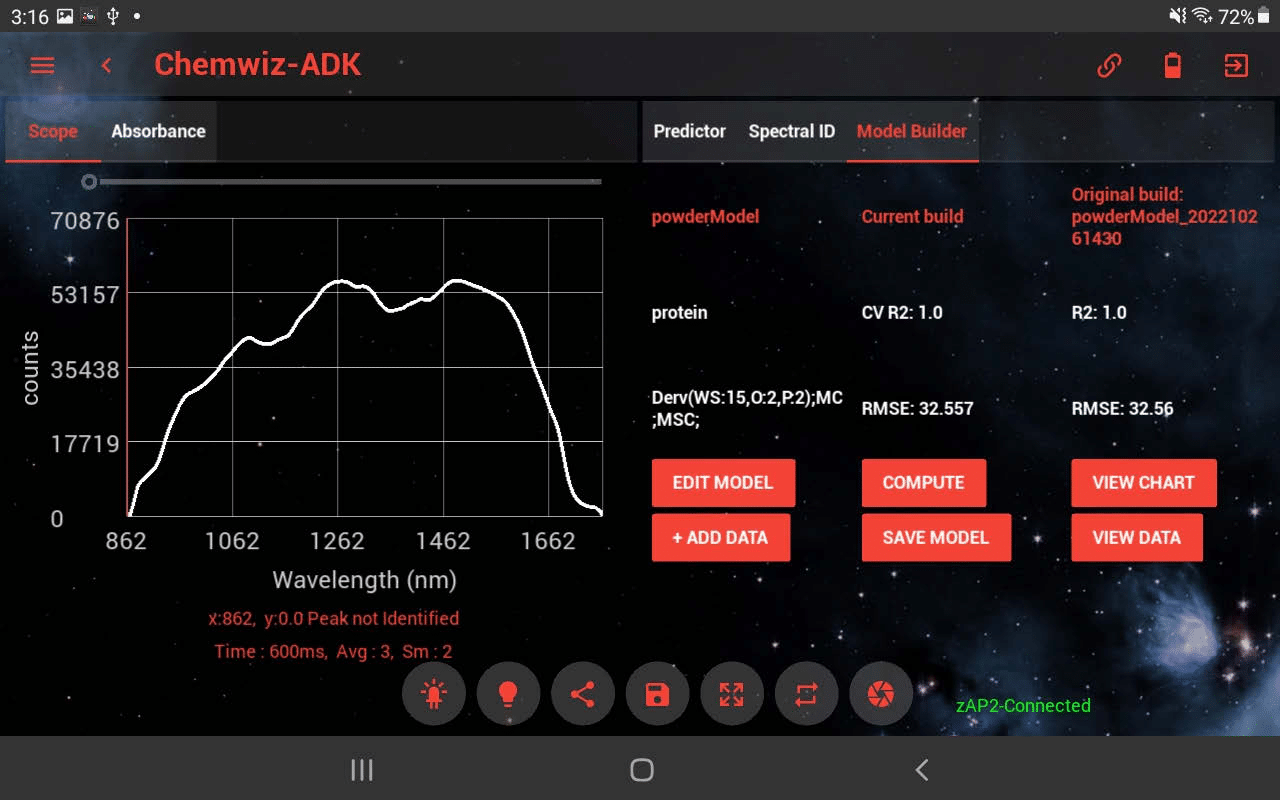
- Multiple models can be saved after computation by click on the “Save Model” button. Added data can be reviewed / removed in “View Data”. “View Chart” will displayed the relationship between real data and predicted data.
- Click Save Data button while in the “Compute Model” tab, will save the most recently captured data spectrum.
|